
There’s a certain magic in a flaky, buttery pie crust — the kind that crumbles just right under a fork and practically melts in your mouth. I didn’t always know how to make that kind of crust. Honestly, I never got it right until I was nearly 30 and made a trip to Grandma’s house for a proper pie lesson. Do you know what she told me?
“Oh honey, I only get it right when I make it in bulk. One crust at a time? I’m terrible making it that way too.”
I laughed, totally floored—Grandma, the pie queen, admitting her crust failures? It was oddly comforting. I laughed and instantly felt better. If she struggled with single crusts, there was hope for me yet. And it was this exact bulk recipe she swore by—the one that changed everything for me, too.
That day, she handed me this recipe—and I’ve used it ever since. Now, it’s part of our family’s rhythm. This isn’t a dainty little batch — it’s a freezer-filling powerhouse of a recipe that makes 9 double pie crusts. Enough to cover holiday gatherings, birthday treats, cozy weekend pot pies, or a spontaneous Friday-night “let’s bake something” moment.
With a stash of this dough in the freezer, I always feel ready — for pie, for people, for whatever life serves up.
Ingredients
- 5lbs (18.1 cups) flour
- 3lbs (6.64 cups) shortening
- 3 cups cold water
- 2 tablespoons salt
This recipe calls for 3 pounds of shortening, which conveniently equals a full container — unless you’ve grabbed the jumbo Costco size, in which case you’ll only need about half. Personally, I’m partial to butter-flavored Crisco for the added richness. Sadly, it’s not available at Costco, but when I’m using a standard 5-pound bag of flour and a full tub of Crisco, it makes the measuring practically effortless — just dump and go!
Start by grabbing the biggest mixing bowl you own. Trust me, if your bowl is too small, flour will end up everywhere — on you, your counters, and probably the kids. Begin by whisking together the flour and salt to evenly distribute everything. Then, using a pastry cutter, work the shortening into the flour until the mixture resembles coarse crumbs — think pea-sized bits. You’re not aiming for a fully smooth mixture; those little pockets of fat are what give you that light, flaky crust. You can use a fork if you’re in a pinch, but with this volume of dough, it’s not for the faint of heart.
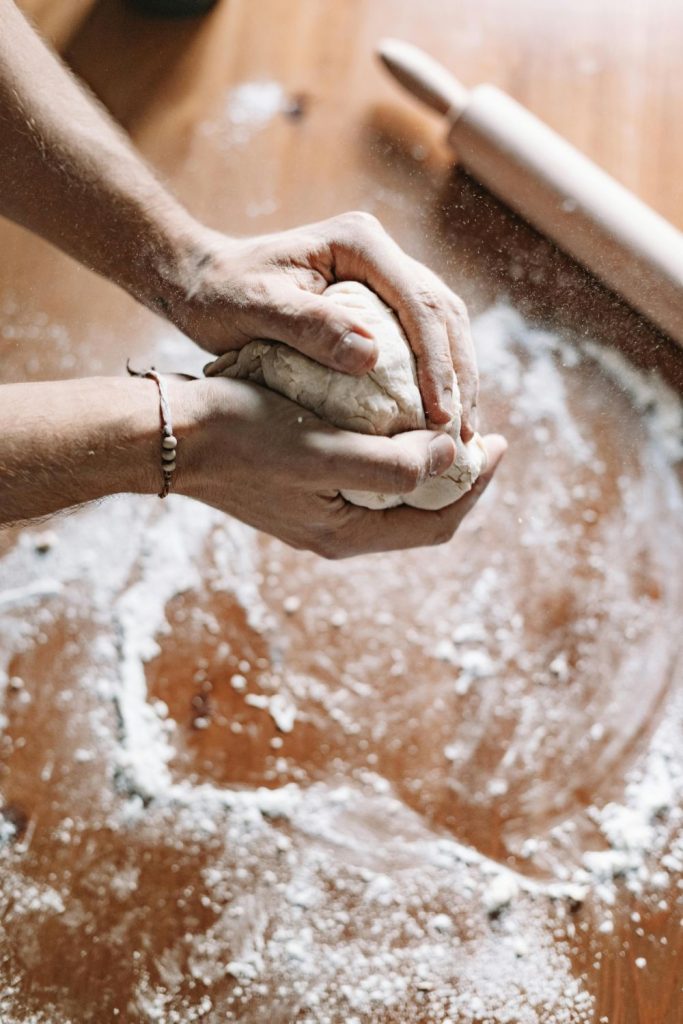
Next, slowly pour in the cold water, a little bit at a time — I usually do about ½ to 1 cup per pour — and gently mix until the dough just comes together. The key here is not to overwork it. Once it’s holding together nicely, stop! Too much handling will leave you with a tough crust instead of the tender, flaky kind we’re going for.
I suggest dividing the dough into 9 portions for double-crust pies. They’re easier to roll out that way, and if I end up with a little leftover, I love making cinnamon roll-ups. Nothing goes to waste — and bonus points for a yummy little kitchen treat.
Directions
In a huge bowl combine the flour and salt.
Using a pastry cutter, cut in shortening.
Working as little as possible, gradually add in the water until the dough sticks together well.
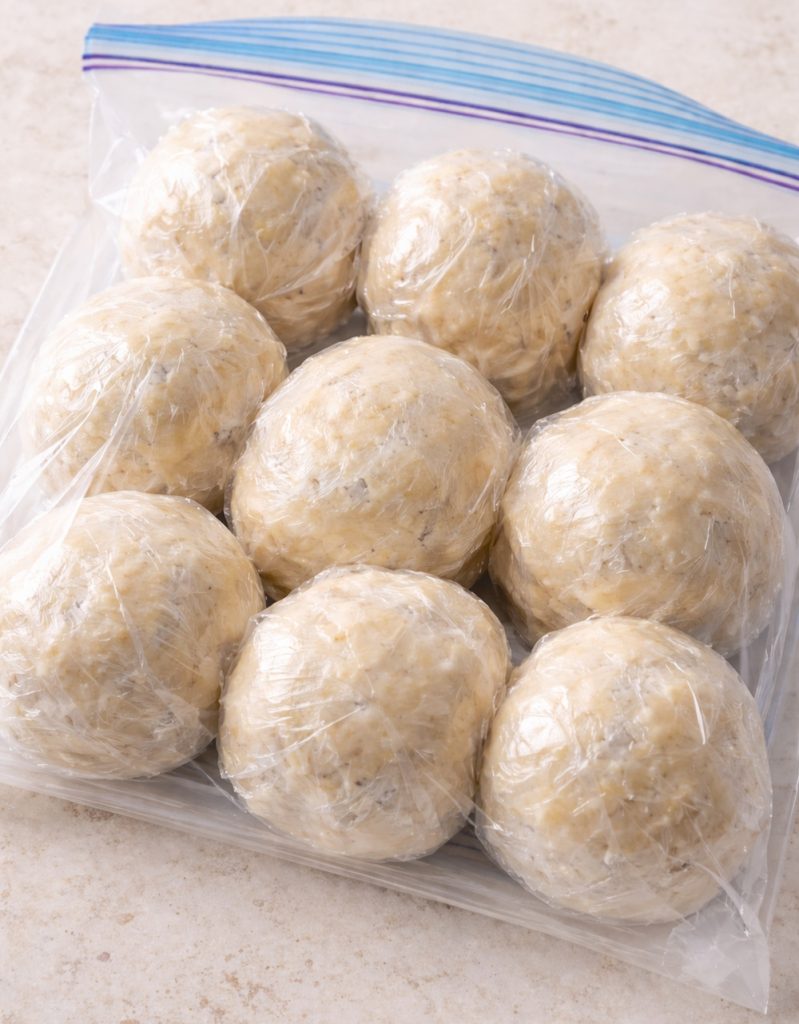
Divide into 9 balls.
Wrap each ball in two layers of plastic wrap and then place in zip lock bags for freezer storage.
These should keep for at least 6 months.
Each ball will make one double pie crust.
Storing and Using Pie Crust
After you are done, you will want to wrap each ball in two layers of plastic wrap and then place it in Ziploc bags for freezer storage. Place them in the freezer for convenient future use. If you want them to store for even longer, you can vacuum seal them and then freeze them.
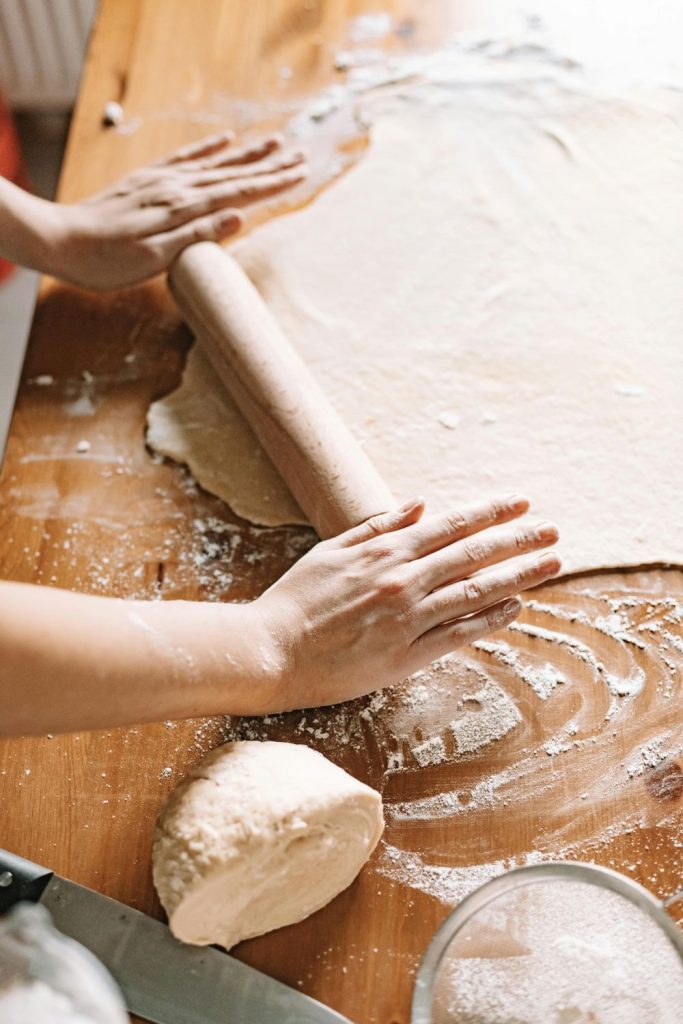
When you’re ready to bake, it’s as simple as reaching into the freezer and grabbing one of those pre-wrapped dough balls. Just set it on the counter and let it thaw for a few hours — no measuring, no mixing, no flour-covered frenzy. I like to rest mine on a plate and drape a clean kitchen towel over the top to keep it from drying out while it softens. With just a bit of forethought, you’ll have pie crust ready to roll whenever the craving hits.
Once it’s thawed, sprinkle your countertop (like Grandma) with a generous dusting of flour. Unwrap your dough and get rolling — literally. A wooden rolling pin is my go-to, and I work from the center outward, turning the dough every few rolls to keep it even. Depending on your preference, you can stretch one dough ball to make both the bottom and top of a pie for a thinner, crispier crust. But if you love a more substantial, bakery-style bite, use one full ball for each layer — bottom and top — to make a rich, thick crust. That version is perfect for hearty dishes like chicken pot pie or even a savory European-style Paul Hollywood Meat Pies. The sturdy crust holds all those delicious fillings without getting soggy — and earns you serious pie-making bragging rights.
Tip: I tried to defrost the dough in the microwave, but it is not the preferred method because it tends to melt the shortening and reduces the flakiness of the pie crust.
Emmaline
One thought on "How to Make Pie Crust In Bulk"
Comments are closed.