
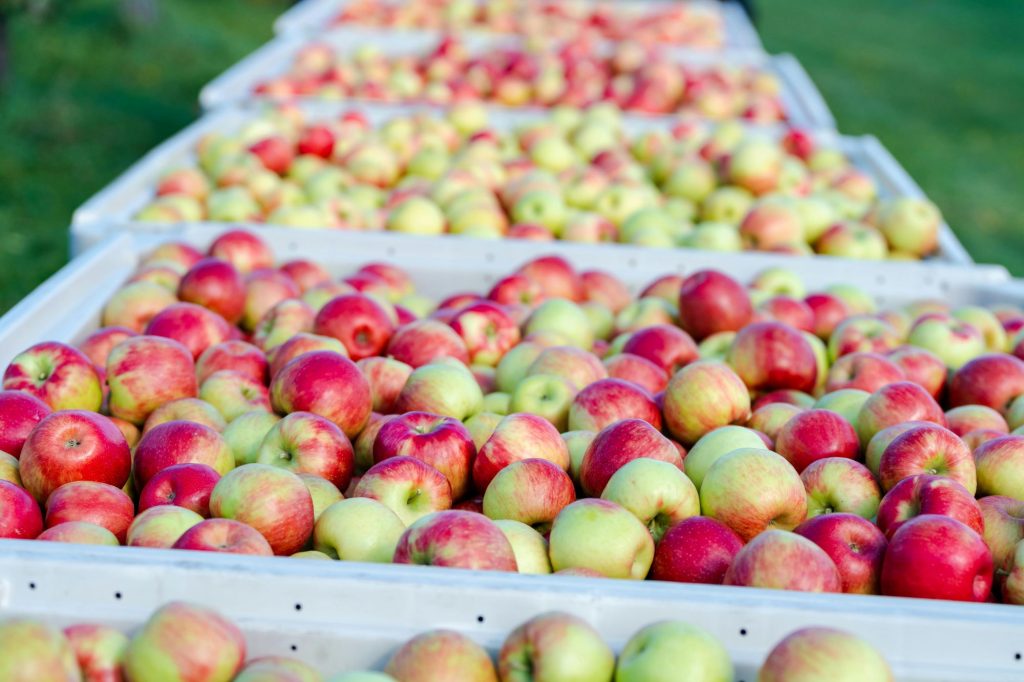
Apple pie has always been one of those “of course, we have to have that” desserts in our family. It’s the dessert that shows up at Sunday dinners, fall holidays, and any gathering where someone says, “I’ll bring dessert,” and everyone secretly hopes it’s homemade apple pie. 😊 Living in the Pacific Northwest, we’re spoiled with apples. When they’re in season, they’re everywhere—crisp, fragrant, and practically begging to be turned into something warm and cinnamon-sweet.
This is my Grandma’s apple pie filling recipe, the one that feels like home the moment the spices hit the stove. It’s the kind of recipe that doesn’t just make pie—it makes memories and brings back the ones we’ve already made. In our family, canning day wasn’t only about food; it was about togetherness. Every single person pitched in. Someone was always washing jars, someone was peeling apples at the table, and someone (usually everyone) was “taste-testing” a little too enthusiastically. Grandma’s kitchen had that steady, happy rhythm—busy hands, friendly chatter, and the comforting feeling that winter would be just a little brighter because we’d planned ahead.
This was also the time Grandma quietly did what grandmas do best: she kept the work moving while keeping us connected. With her hands busy and her ears wide open, she’d dish out advice as easily as she dished out apple slices—asking who we were “talking to,” whether anyone was dating someone worth her approval, and then sliding right into the real questions: how our grades were holding up, what activities we were loving (or dreading), what we were learning, and—because she always somehow knew—what we were avoiding. And the funny thing is, it never felt like an interrogation. It felt like being seen. Like she cared about every small detail of our lives, right down to the awkward teenage drama, and she was determined to stir us back into the right direction with the same steady patience she used on that thickening sauce.
One reason I love this recipe is that it’s practical in the best way. Canning the apples means we capture the season while it’s at its peak, and then we get to enjoy it all year long. Apple pie filling is also one of those pantry miracles: it turns into a quick pie, a crisp, a spooned-over-ice-cream dessert, it jazzes up boring oatmeal, or even pour it as an indulgent pancake and waffle topping when you want breakfast to feel like a celebration. Yun.
There’s also a deeper reason this recipe matters to me. In families, recipes are a kind of heritage—little handwritten acts of love passed along. I’ve seen how powerful that can be, especially when life takes unexpected turns. Having family recipes saved and shared is like having a piece of each other, ready to be pulled off the shelf when you need comfort, familiarity, or a reminder that good things can still be made, even after hard seasons. That’s why I spent time copying so many of Grandma’s recipes, and now most of my cousins know they can call me when they’re hunting for “that one” recipe they remember but can’t quite place. I genuinely love being the keeper of our family recipes, and one of the reasons I’m creating this travel, book, and food blog is to share them—so these little pieces of home keep feeding my people for generations to come.
If you’re new to canning, Grandma would tell you the biggest secret is planning ahead. Canning goes so much more smoothly when everything is prepared and you’re not scrambling mid-process. And because canning is seasonal, it’s easy to forget the little details from one year to the next—until you’re standing there thinking, “Wait… do the lids go in hot water first?” (Ask me how I know.) Having a set routine you repeat each season makes it feel calm and doable, not stressful.
As written, this recipe generally makes about 6–7 quarts of apple pie filling. For me, it usually lands right around 6 quarts with just enough left over to make a nice little treat. Or, maybe it only makes 6 because I taste-test too many times.
Before you begin, start with jar and lid prep—this part is worth doing right so everything stays safe and seals properly. I sanitize my jars by washing them on a high-temperature cycle in the dishwasher. For the lids, I place them in a small pan of water on the stove. I don’t turn the stove on yet—I just let them rest there while I get everything else ready. It’s a simple little step that makes me smile every time, because it feels like the opening scene of canning day: the quiet “getting set” before the delicious chaos begins.
Okay, let’s get down to canning.
Apple Pie Filling Ingredients
- 10 cups water
- 8 pounds sliced or chunked, peeled, tart apples
- 4 1/2 cups sugar
- 1 cup cornstarch
- 3 tablespoons + 1/4 cup lemon juice
- 2 teaspoons cinnamon
- 1 teaspoon salt
- 1/2 teaspoon nutmeg
Making Apple Pie Filling
Blend sugar, cornstarch (you can substitute with Clearjel, which has a better record for canning), and spices in a large pot off the heat. Mixing these all together now makes it so that the cornstarch will not clump. Being able to see the dark spices helps you to know when it has been mixed thoroughly.
Add water to the dry ingredient mixture, mix it well, and turn the burner on medium-high. Cook it over medium to high heat until it has thickened. This can take as long as 15 to 30 minutes.
While this is cooking, fill your boiling water bath about halfway and place it on medium heat to warm up. We want it warm, but we do not want it to boil yet.
Half fill a large bowl with warm water and 1/4 cup of lemon juice. Peel, slice, and core apples while you are waiting for the sauce to thicken; stir the sauce regularly. Be sure to scrape the sides and bottom. If you use an apple peeler/slicer/corer, slice the spiraled apple slices in half (or whatever size apple chunks you want).
Place the apples into the lemon water to reduce discoloring from oxidation. Continue to stir the sauce until it is thick, then turn off the heat and add 3 tablespoons of lemon juice. The lemon juice adds to the acidity of the sauce.
Filling the Jars
Turn on the burner for the jar lids. Bring it to a boil and leave it at a simmer until you are ready to use the lids. Check back on the water level regularly to be sure it hasn’t boiled off. Yep, I’ve made that mistake also, that’s why I can warn you against it.
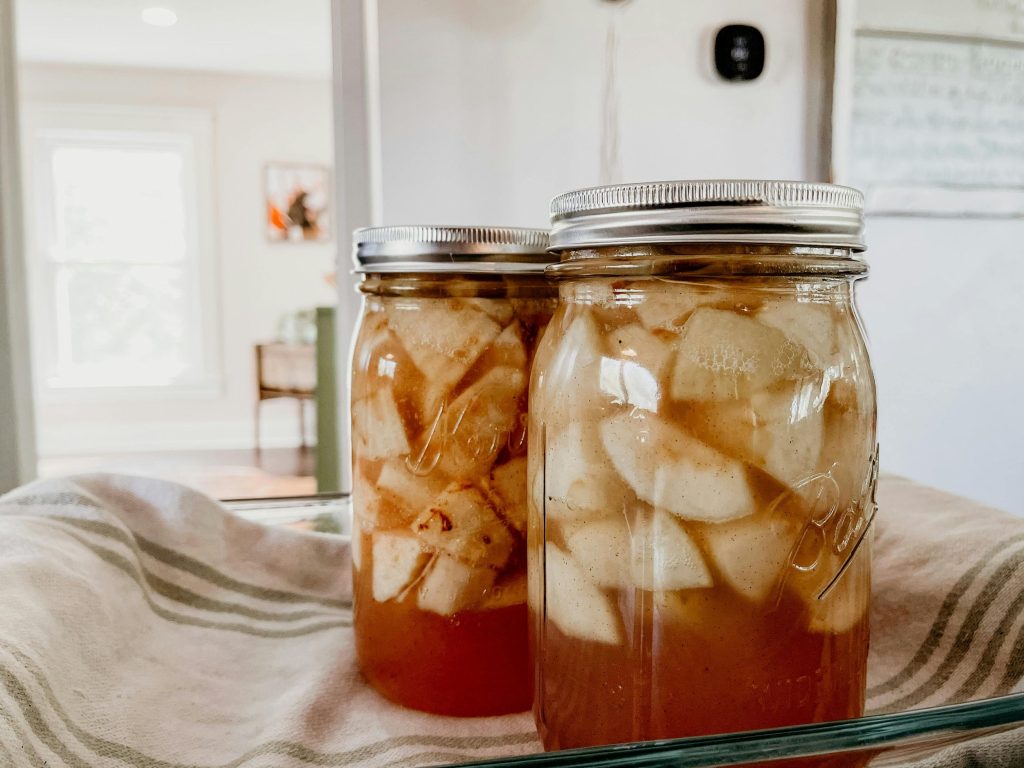
Now you have 2 options: You can add the apples to the sauce and stir to coat them. Then place them in hot quart-sized jars. The second option is to ladle a scoop of sauce into the bottom of the jar, then stack in the apples, leaving room for the sauce, pour some more sauce over the apples, leaving 1 inch of headspace. Wipe the rim of the jar with a clean cloth. Without touching the underside, place the lids on the jars and tighten them until they are fingertip-tight.
Canning Apple Pie Filling
Place the filled jars in the water bath. The water should be 1 inch above the top of the jars once all of them have been added. If the water is too low, add more hot water. If it is too high, it might boil over, so remove some. I like to use a liquid measuring cup that has a nice handle to avoid burning myself with the hot water. Bring the water to a rolling boil then start a timer for 25 minutes (see altitude notes for elevation time adjustments).
Once the time has passed and the apple pie filling has been water bath processed, take off the lid, turn off the heat and allow the jars to cool for 5 minutes. Then, remove the jars from the boiling water bath and place them on a towel on the counter. The towel protects the counter from being burned and the jar from the cool counter, which could break the jar due to the temperature difference.
Allow the jars to sit for 24 hours.
Processing Complete
After 24 hours, check to be sure that the lids have been sealed down. Lids will suck down if they are sealed. You may even hear some popping noises as the jars cool and seal. If you have any that do not seal, place them in the refrigerator and use them within the next week. Label your jars with the contents and the date preserved. Store sealed jars in a clean, cool, dark place. The ideal storing temperature is 50—70 degrees Fahrenheit. Home-canned goods are best if used within the first year but can be used up to three years from the time canned. After that, the nutritional value decreases. Remember: When in doubt, throw it out. If the food looks questionable, it is best not to chance it.
This apple pie filling can be used for pie (no surprise there), crisp, on pancakes or waffles, as ice cream topping, and any number of other uses. I have even used it as a base for smoothies and blended it up and dehydrated it for some of the best fruit leather.
Altitude Notes
Altitude Adjustments for Boiling Water Bath Canner
- Altitude in Feet – increase processing time
- 1,001-3,000 – increase 5 minutes
- 3,001-6,000 – increase 10 minutes
- 6,001-8,000 -Iincrease 15 minutes
- 8,001-10,000 – increase 20 minutes
Let’s Make a Pie
And here’s the best part: once you’ve got these jars lined up on the shelf, apple pie becomes one of the easiest “homemade” desserts you can make—no peeling, no coring, no sticky counters, no last-minute scrambling. Just open a jar of your own apple pie filling, breathe in that cinnamon-and-home smell, and you’re halfway to dessert already.
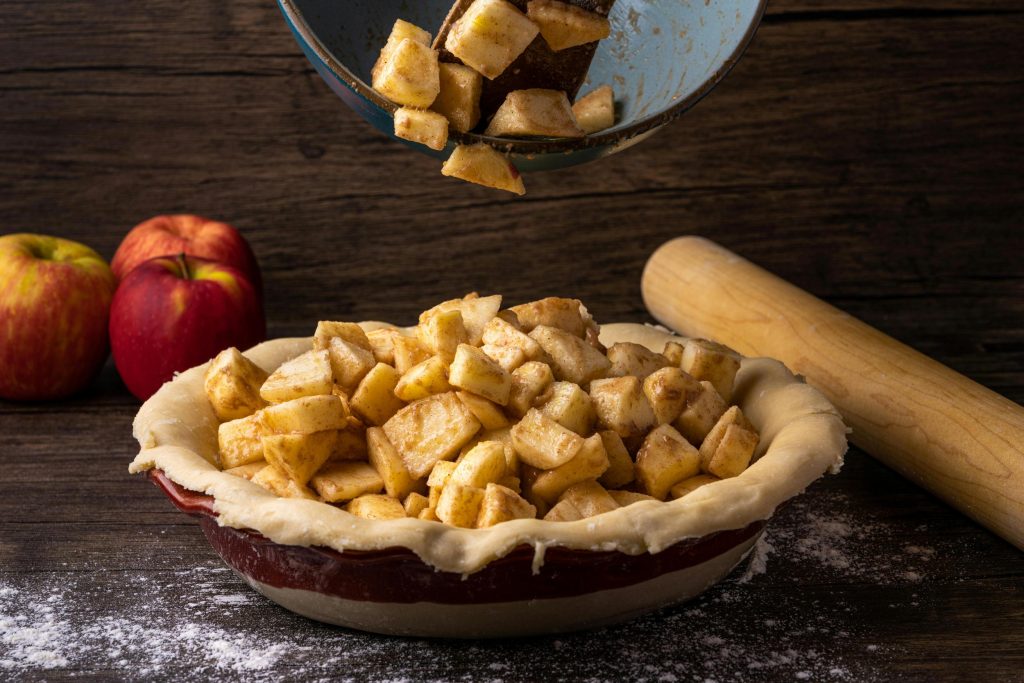
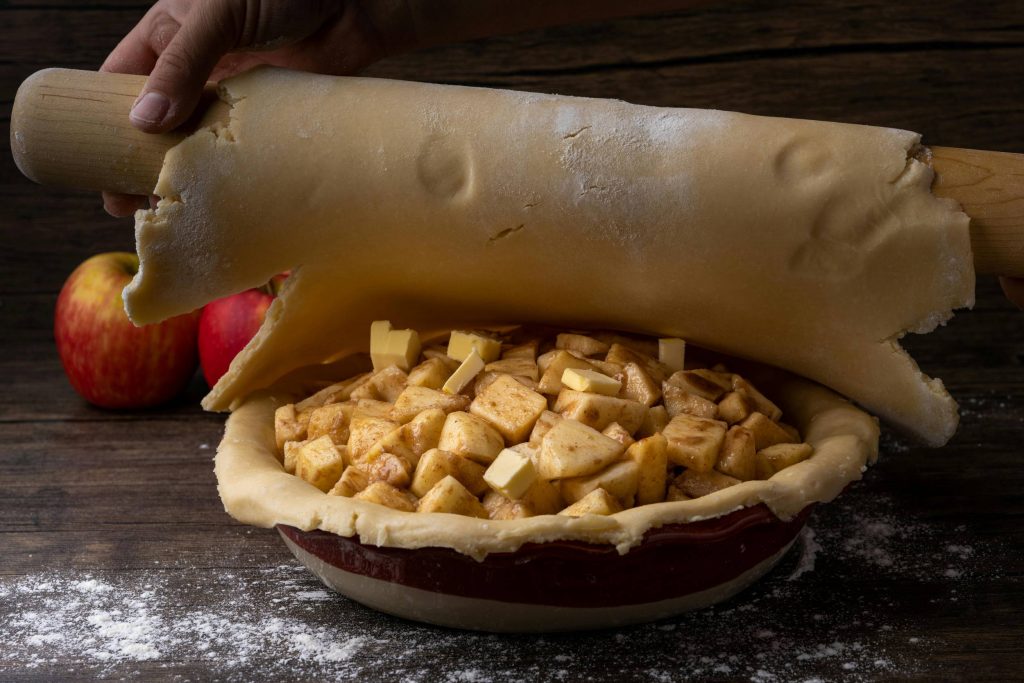
When you’re ready to bake, simply prepare your pie crust in your favorite pie dish, pour in one jar of filling, egg wash the top, and bake. That’s it. The apples are already sliced, the sauce is already thickened, and the flavor tastes like you spent hours—when really, you just planned ahead during apple season.
It’s the kind of shortcut Grandma would absolutely approve of, because it still counts as real homemade baked apple pie … just smarter.

And if you want to make the whole process even easier, I’m also sharing my bulk pie crust recipe. It’s designed to save time and effort the way good kitchen routines should. I’ll link that post here so you can jump straight from “pantry jar” to “pie on the table” without any stress.
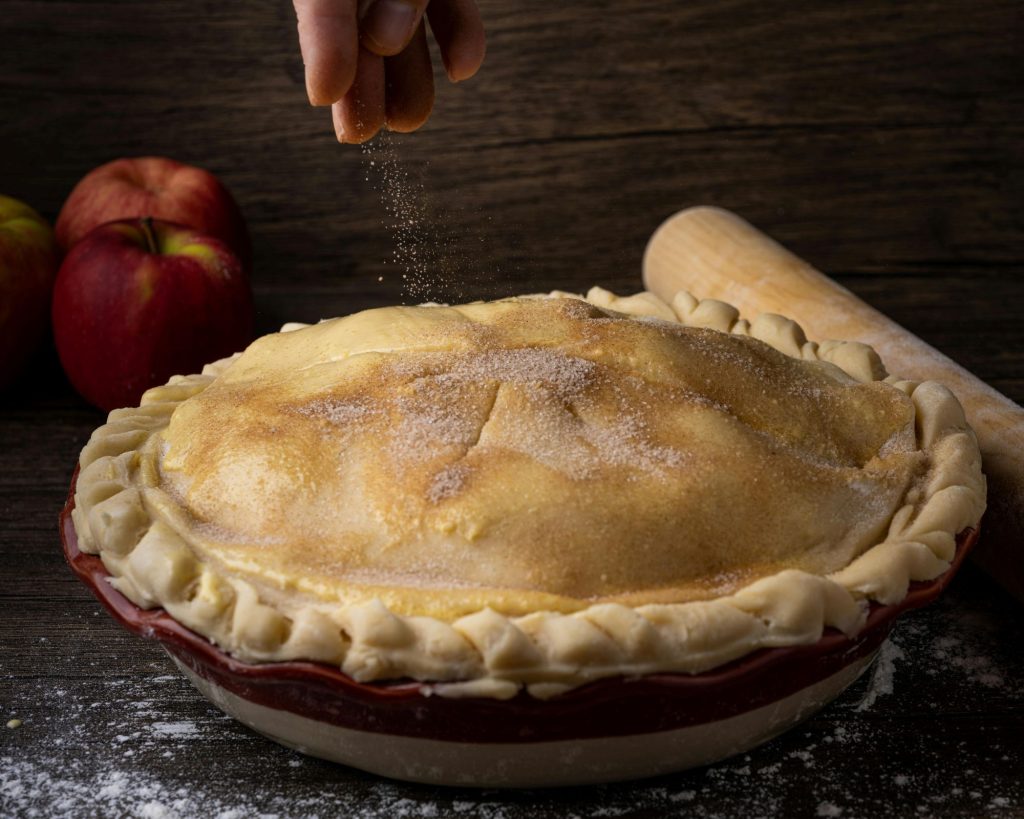
One little finishing touch I love: after you brush the top crust with egg wash, sprinkle a light dusting of cinnamon and sugar over the top. It bakes into a delicate, sweet-spiced “crusty sparkle” that adds just the right hint of warmth and crunch—almost like a tiny snickerdoodle kiss on the outside of your pie. It doesn’t overpower the filling at all; it simply deepens the cozy flavor and makes that first bite of crust extra special.
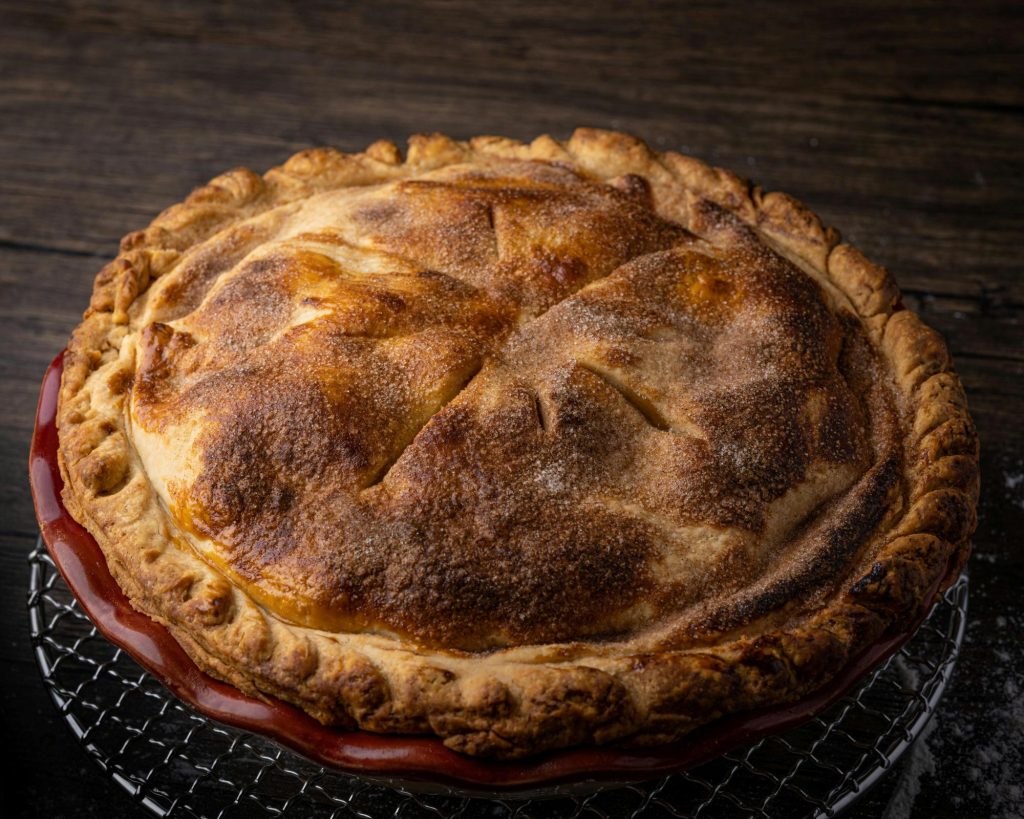
Set that finished pie on the counter for a minute and just enjoy it—the golden crust, the gentle bubbling at the edges, the way your whole kitchen smells like fall and comfort. This is the kind of baked apple pie Grandma would beam over: made from your own jars, made with intention, and made with the kind of love that shows up in small, steady ways. Slice it while it’s still a little warm, serve it to your favorite people, and let that first bite be a reminder that the simplest traditions are often the sweetest.
One thought on "How to Make Apple Pie Filling"
Comments are closed.